iPhone & iPad

How to Record Your iPhone Screen

Your iPhone has a built-in recorder. Here's why the app is better when you plan to edit or share.

Every iPhone and iPad running a recent version of iOS has a screen recorder built in. It works for quick clips. But the moment you need a clean editor, reliable long recordings, or a proper place to manage your files afterwards, the built-in tool runs out of options fast. This page shows both routes - the built-in Control Center recorder and the free Screen Recording App - and when a dedicated app makes the difference.

Free download

Get Screen Recording App on Web, iPhone, iPad & Android

Record your screen wherever you are - in your browser on desktop, or with the native app on mobile. No account, no watermark, nothing uploaded.

What your iPhone already has

iOS includes a screen recorder in Control Center. Add the control once (Settings > Control Center > Screen Recording), then swipe into Control Center and tap the record button. It starts after a short countdown and saves the clip to Photos. It's simple and it works - for basic use.

The problem is that "basic" is all it does. The Control Center recorder captures the whole screen with a tap, but the editing is minimal, the file lands in Photos mixed in with everything else, and there is no recording list, no rename, and no built-in trim beyond the basic Photos crop. Once the clip is saved, you're on your own.

How screen recording works on iOS

Unlike Android, an iOS app cannot capture the screen from inside its own process. Apple does not allow it. Instead, iOS records the screen at the system level and hands the video to an app you choose. This is the same mechanism the built-in recorder uses.

Screen Recording App uses Apple's system broadcast to do this cleanly. When you tap Record, iOS shows a broadcast picker. You select Screen Recording App and tap Start Broadcast. From that point the app receives the whole screen - with your microphone and app audio - and saves it inside the app, ready to edit and share. Nothing is sent to our servers. The recording is created on your device and stays there.

Built-in recorder vs. Screen Recording App

Side by side: what the built-in Control Center recorder gives you out of the box, and what the app adds when you plan to edit or share.

Feature Built-in recorder Screen Recording App
Screen recordingYesYes
App (system) audioYesYes
Microphone audioYesYes
On-device editorNo - basic Photos crop onlyYes - trim, cut, mute, rotate, speed, crop, filters, GIF
Recording list with detailsNo - clips go to PhotosYes - duration, size, name
In-app previewNoYes
Rename recordingsNoYes
Trim and cut without PhotosNoYes
Export to GIFNoYes
Share directly from the appYes - via share sheetYes
No watermarkYesYes
No account or signupYesYes
Nothing uploadedYesYes
PriceFreeFree

The iPhone screen recorder for editing and sharing

Screen Recording App records the whole screen through Apple's system broadcast, then gives you a real editor and a proper recording list - all included, free, no watermark, no account, no cloud. Recordings never leave your iPhone or iPad.

Step by step: Recording your screen on iPhone

The broadcast picker is controlled by iOS, so the flow is consistent across every iPhone and iPad - only small wording differences appear between iOS versions.

  1. Install Screen Recording App from the App Store. Open it from your Home Screen.
  2. Tap Record in the app and choose your audio option (microphone, app audio, or both).
  3. Pick the app in the broadcast picker. iOS shows a system sheet - choose Screen Recording App and tap Start Broadcast. This picker comes from iOS itself, not the app.
  4. Use your iPhone normally. Switch to whatever you want to record - apps, games, tutorials, settings. The recording runs in the background, and the status bar shows a red indicator.
  5. Stop when done. Tap the red status bar indicator (or the recording pill in Control Center) and confirm Stop. Then open Screen Recording App to trim, edit, and share the clip.

Here is what the broadcast picker from step 3 looks like on iPhone. The exact layout shifts slightly between iOS versions, but the purpose is the same - iOS asks which app should receive the recording before the broadcast starts.

iOS Screen Broadcast picker with Screen Recording App selected and Start Broadcast
The iOS broadcast picker

Using iOS's built-in Screen Recording

If you just need a quick clip and don't plan to edit it, the built-in recorder is the fastest route. Set it up once, then it's one tap away.

  1. Add the control. Open Settings > Control Center, find Screen Recording, and tap the plus to add it.
  2. Open Control Center. Swipe down from the top-right corner (or up from the bottom on older iPhones).
  3. Tap the record button (the solid circle inside a ring). Recording starts after a three-second countdown.
  4. To record microphone audio, press and hold the record button first, then turn the Microphone toggle on before you start.
  5. Stop by tapping the red status bar indicator, or reopen Control Center and tap the record button again. The clip is saved to Photos.

The built-in recorder is fine for a fast grab. When you need to trim, cut, mute, rotate, change speed, crop, add a filter, or export a GIF - and keep your recordings organised rather than lost in Photos - Screen Recording App handles all of it on device.

What you can and can't record on iPhone

iOS controls what can be captured. These limits apply to every recording method, including the built-in one.

Records normally Does not work
Home Screen, Settings, and notificationsNetflix, Disney+, and other copy-protected streaming apps
Games and gameplay footageApps that block screen capture (some banking apps)
Social media apps and SafariContent protected by DRM (FairPlay)
Video calls (your side)Some payment and authentication screens
Microphone and app audioAudio from DRM-protected media

A black screen on a streaming app is a system-level restriction, not a bug. iOS enforces copy protection on behalf of content providers. No recording method can bypass this.

Tips for better recordings

Frequently asked questions

Common questions about screen recording on iPhone and iPad.

Does my iPhone have a built-in screen recorder?

Yes. iOS includes a screen recorder in Control Center. If you don't see the record button, add it first: open Settings, tap Control Center, find Screen Recording, and tap the plus to add the control. Then swipe into Control Center and tap the record button.

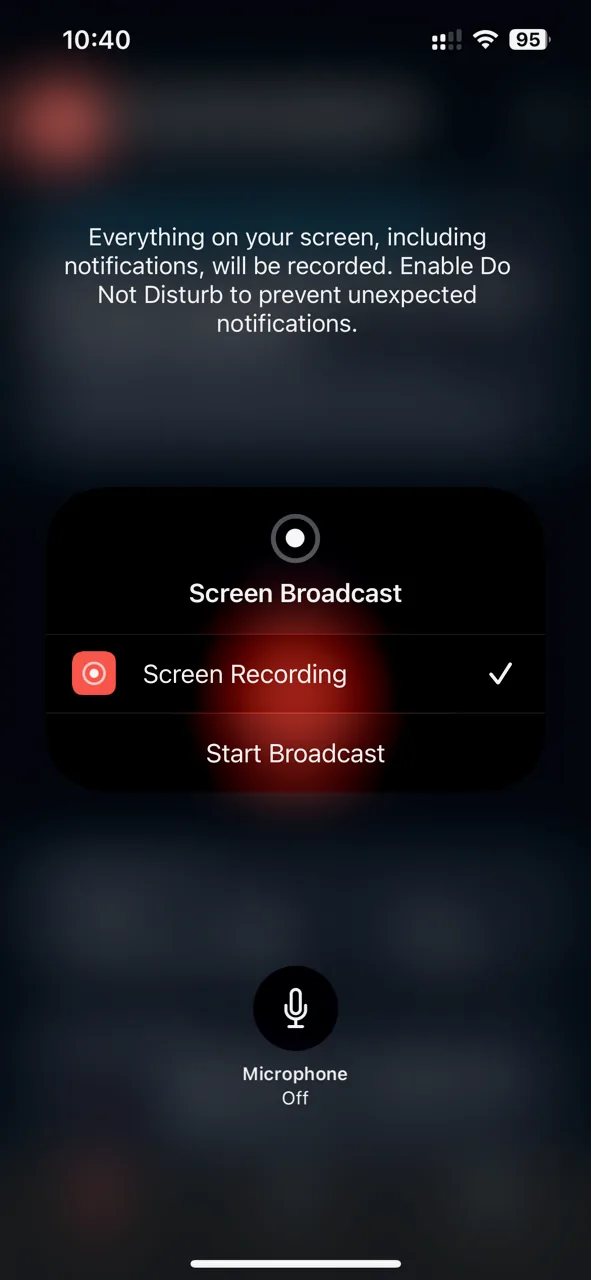
Why does the app ask me to start a broadcast?

iOS does not let a third-party app capture the screen from inside its own process. Instead, iOS records the screen at the system level and hands the video to the app you pick in the broadcast picker. Choosing Screen Recording App and tapping Start Broadcast is what grants the app the screen feed. It is the standard, Apple-approved way to record on iOS.

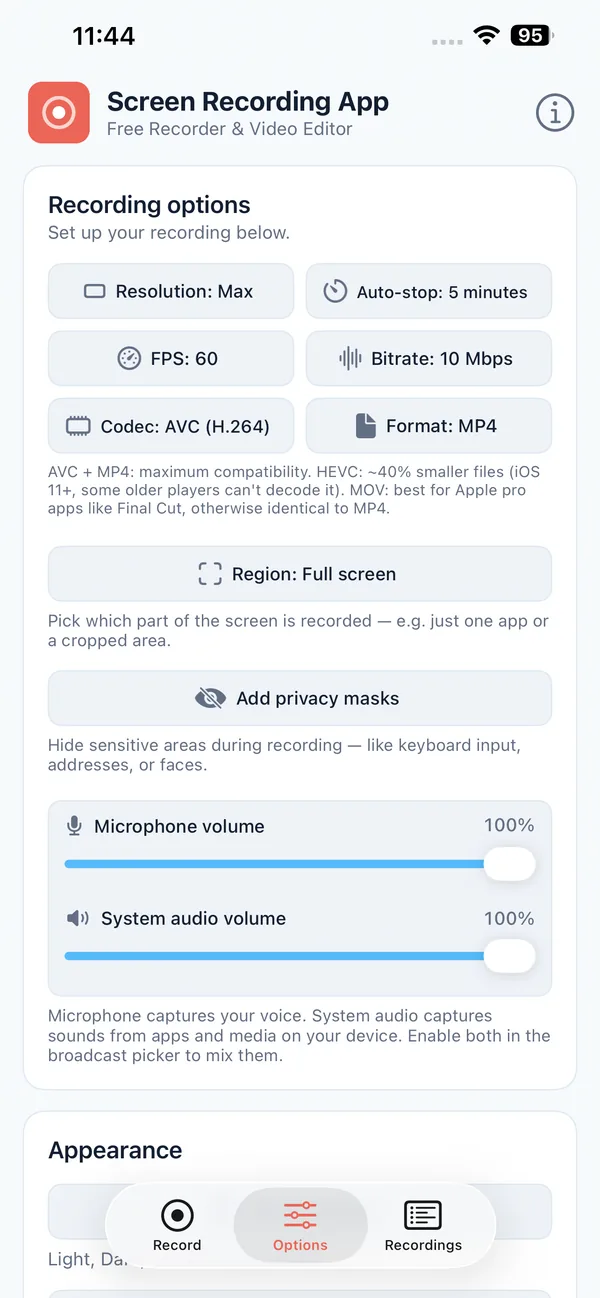
Can I record internal (app) audio on iPhone?

Yes. The recording captures app audio along with the video, and you can add your microphone on top for narration. Audio from DRM-protected media (such as Netflix) is muted by the system, the same as the video.

Why does Netflix show a black screen in my recording?

Streaming apps like Netflix, Disney+, and Amazon Prime use FairPlay copy protection built into iOS. The system blocks screen capture for these apps, so the video portion is black or blank. This applies to every recording method - apps and the built-in recorder alike.

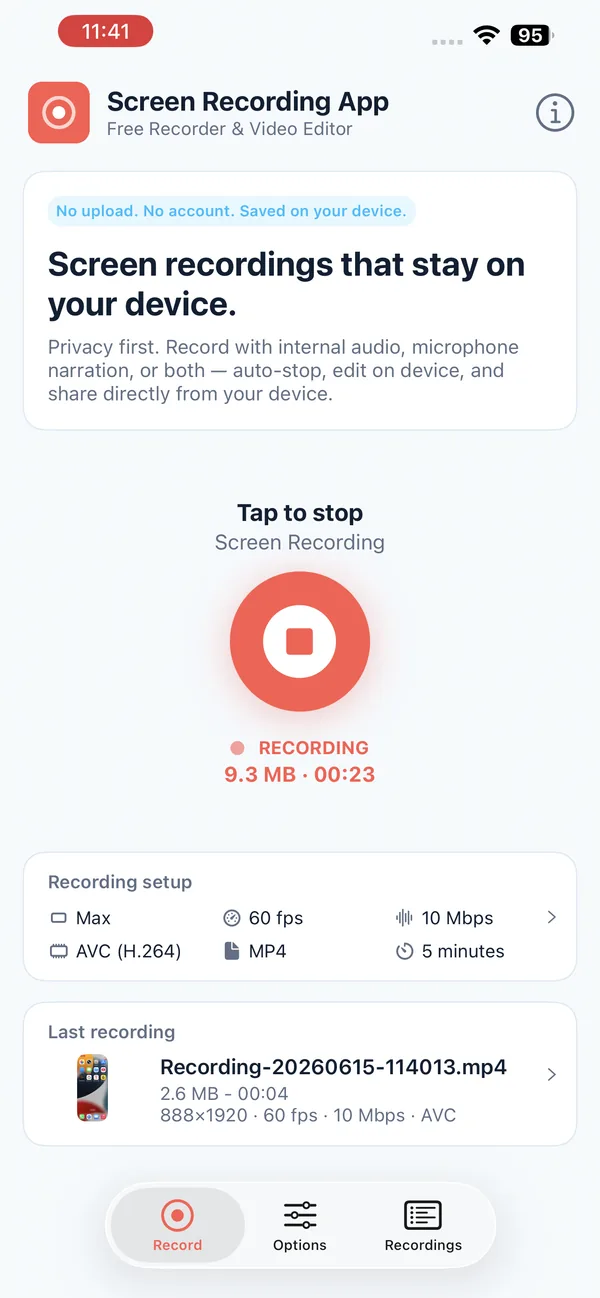
Is anything uploaded when I record?

No. The recording is created on your iPhone or iPad and saved inside the app. Nothing is sent to a project server. There is no account and no cloud step - the video stays on your device unless you choose to share it.

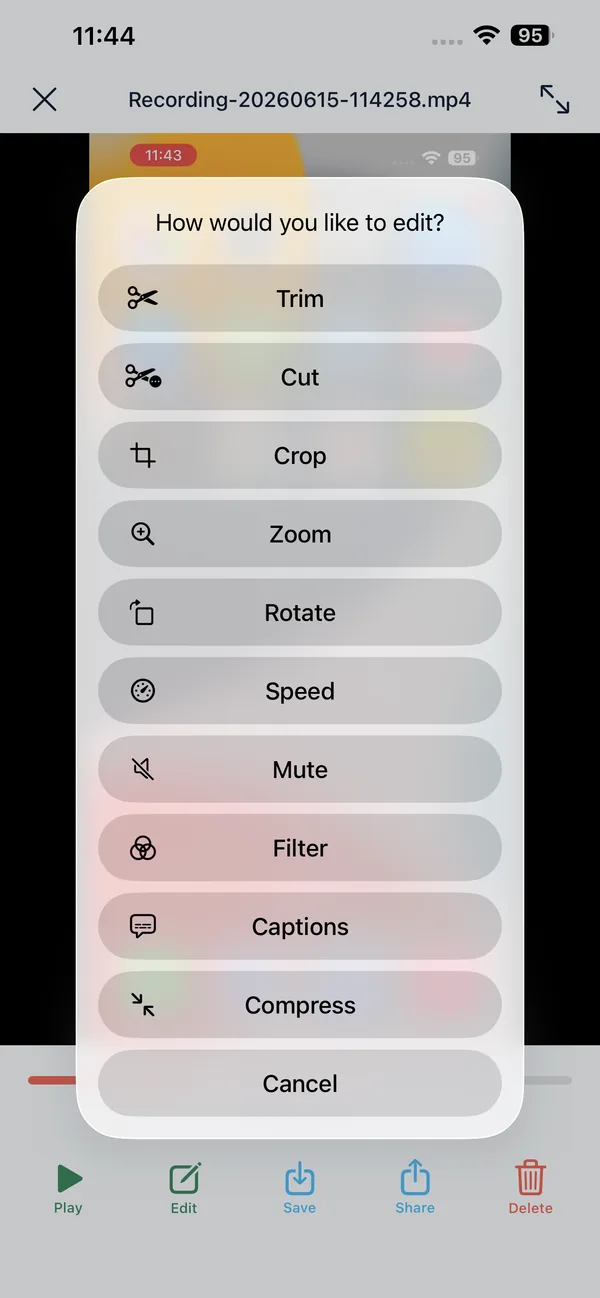
Can I edit the recording afterwards?

Yes. Screen Recording App includes an on-device editor: trim, cut, mute, rotate, change speed, crop, apply filters, and export a GIF. Everything happens on the device, so your recording is never uploaded to be processed.

Does screen recording work on iPad?

Yes. iPad works the same as iPhone. The broadcast picker and the built-in Control Center recorder both behave identically, and recordings match the iPad's screen resolution.

How do I add my microphone to a recording?

In Screen Recording App, choose the microphone (or microphone plus app audio) option before you tap Record. With the built-in recorder, press and hold the record button in Control Center and turn the Microphone toggle on before starting.

Is there a watermark or a time limit?

No watermark and no forced time limit. Screen Recording App does not stamp a logo on your clips. As with any recording, the practical limit is your device's free storage.

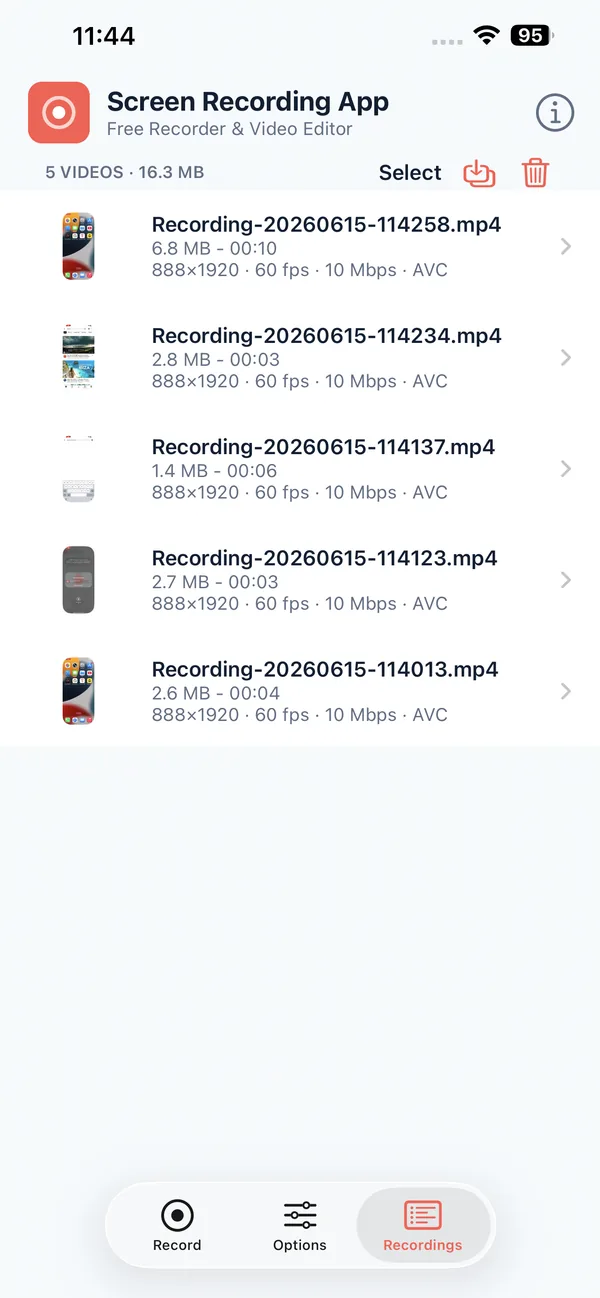
What's the difference between the app and the built-in recorder?

The built-in recorder handles basic capture and drops the clip into Photos. The app adds a real editor (trim, cut, mute, rotate, speed, crop, filters, GIF), a recording list with details, in-app preview, and rename - so your recordings stay organised and are ready to share. Think of it like the difference between the built-in camera app and a dedicated one.

Get started

If you want a screen recorder that captures microphone and app audio, gives you a proper editor, shows no watermark, and keeps everything on your device, Screen Recording App is free on the App Store.

Need to record a computer screen instead? The browser-based recorder works on any desktop or laptop without installing anything.

On Android too? See the Android recording guide for the equivalent steps on phones and tablets.